Thursday, May 21, 2020

Gravel build - Cable routing

Here is the plan
Cables enter the frame on the down tube, gear cables go to under the bottom bracket, where there is a cable guide, and the up to the front mech, or straight inside the chainstay for the rear mech.

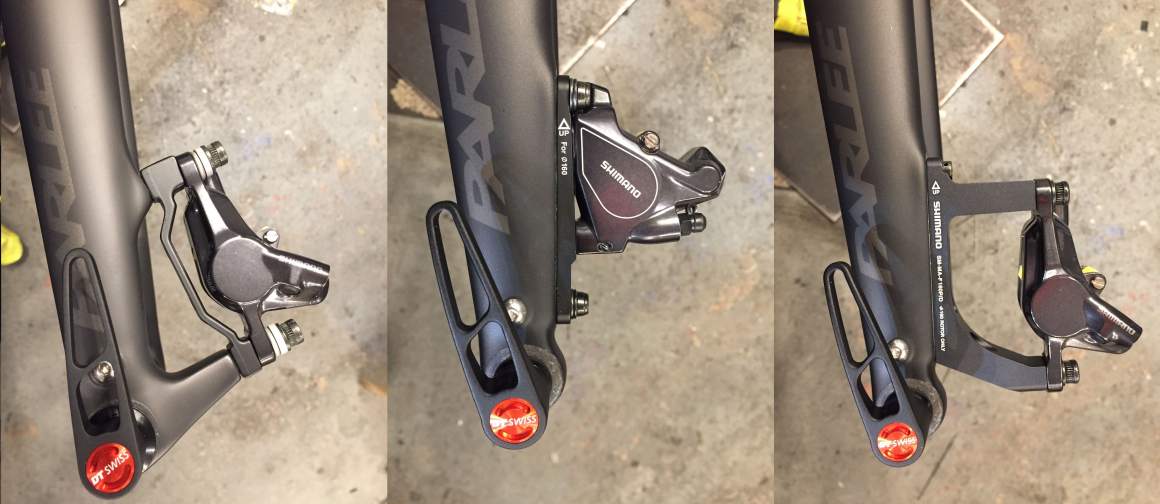
For the rear brake, housing (or hose if you run hydros) runs inside the frame, above the bottom bracket area in to the chainstay. Housing exists the chainstay near the brake caliper.

There are some stories on how internal cable routing is the bogey man, and hard to install/service etc, but if you take some care, no rush, and do it properly it is a good thing.
Looks nicer, and cables are not so exposed to the elements, mud, sweat, so they keep running well for longer.

Nice things to have
1 - Install cable liners ! Makes everything smoother, cables are protected from corrosion, they do not contact other parts and only move inside the liner.
So, less friction, no wear on cable guides.
BONUS : When you want to replace the cable, just feed it into the liner, no fishing needed.
2 - For housing/hoses inside frame, use dampening foam,otherwise it will rattlle.
Bare cables are always stretched, so they do not rattle (as much), but housing WILL make mind altering knock knock knock noises on rough surfaces.
3 - Magnetism is awesome. Have difficulties routing cables and inners inside the frame? Use a magnet.


 Jagwire liner, it has an endcap, so just plug that to your housing, and liner goes in the frame.
Do not forget to run the liner through the frame port before inserting.

The centerpiece for internal housing, the area under the bottom bracket. The frameset came with 2 guides, one for 1x drivetrain, and this for 2x. It also has a nice screw-on cover for this area.

 Liner coming out on the front mech area. Rubber grommet to keep water/mud ingress limited.
 Rear mech cable exit.


 Brake Housing inside the foam liner.


 Here is the brake housing exiting the frame (inside the foam)


Cable port installed, connected to caliper.

Rear mech cable exits on the top of the chainstay. Add another bit of housing and DONE !
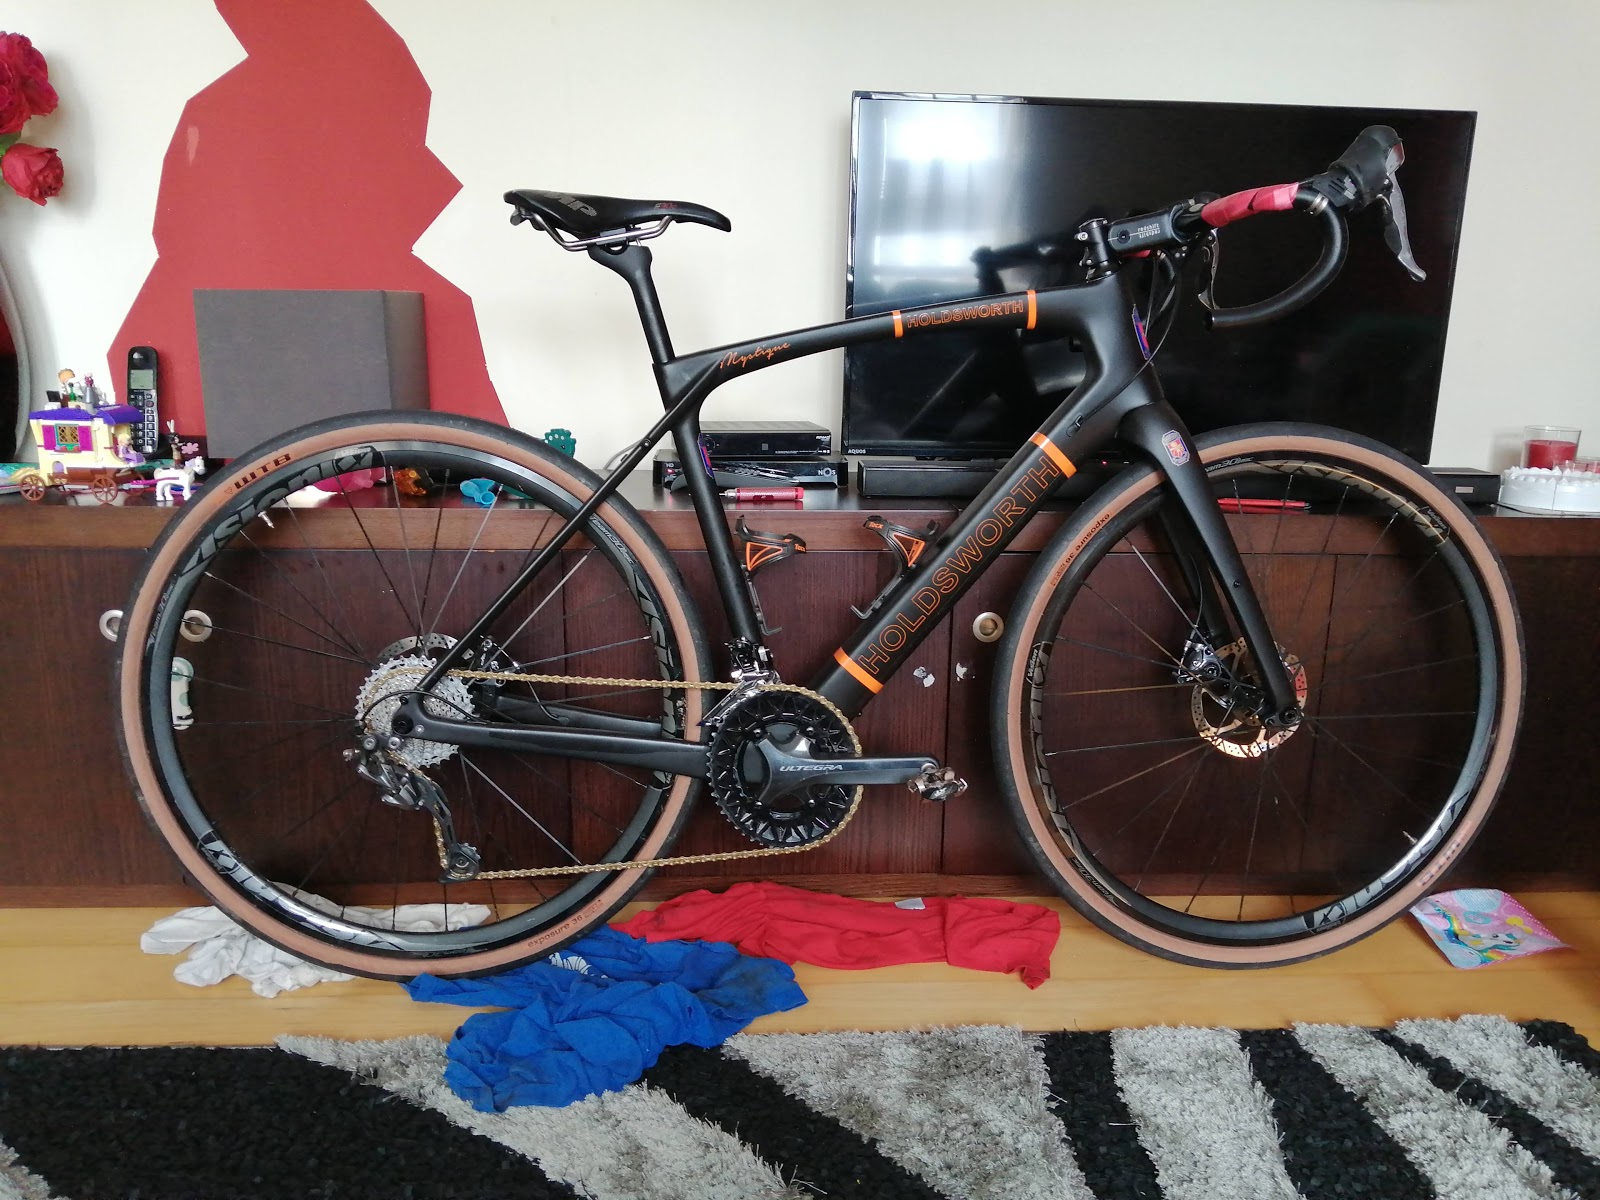
(Notice the GOLD chain, because... BLING ! )
(Also notice the adhesive protection on top of the chain stay, to protect from chain slap).

Trim cables to size, place anti-fray caps (or super-glue) and we are almost done !
(We will need to index gears, center brakes, etc, but I will do that with the bike on the stand as it is much easier that way).

Wednesday, May 13, 2020

Gravel build - Power !!

Installing the crankset also means installing the powermeter.

In this case a 6800 Stages Gen2, remanufactured for Gen3 (thank you Stages for making this happen) in left-side only option.

I assembled everything on the bike, tried a spin test and ... "ffftttttt ffftttt ftttt" 

????????????
!!!!!!!!!!!!!!!!!!!!
?????????????

Took a closer look and ... the HORROR, the DRAMA, the TRAGEDY ! 


The battery door is scraping the chainstay !!!!!

How/Why can this happen you ask ?

Well... This is a Gravel bike, so maximum tire clearance is wanted, that can still fit a road crankset.
The specification for the chainstay / crank clearance is of around 6mm or so.

So, if you use tighter manufacturing specs/etc, you can tap into that "hole" and use it.

In the frame, this space was used to make chainstays larger, so you can fit larger tires, so you can have more FUN.

In the crank, this space has been used to add a pod that will allow you to measure power/cadence.

So... TWO components tapping into the same space, and it is now gone...

OPEN has a nice explanation about this that I am going to copy to illustrate :

Some power meter design conflict with the desire to have the most tire clearance.
The reason this is tricky is:
  • As you know, the UP/UPPER has the most tire clearance of any performance frame that fits regular road cranks. And that is the defining feature, more clearance = more fun.
  • It's also crucial that we can fit road cranks, if you use mountain bike cranks you do create more clearance but you give up efficiency due to the bigger Q-factor (in plain English, you ride like a duck). Less efficient, less aero, less speed. And that would not be acceptable, as we want you to be able to ride with your roadie friends on your UP (or at least go their speed even if you don't want to ride with them). The UP should be ultra-performing on- AND off-road, not forcing a choice between the two.
  • Anyway, lots of space for the tire and insisting on running narrow road cranks means there is not much space for the chain stays. To make the chainstays as big as we can, we do two things:
    1) drop the driveside chainstay, which has become one of the defining (and most-copied) features
    2) focus on very tight tolerances in production to reduce the space between crank/chainrings and chainstay
  • This second part is very important. To give you an idea, the standard clearance in the bike industry in that area is 6mm, we use 2mm in some areas. That 4mm extra is huge when you're chainstays go from 10mm to 14mm. Taking wall thickness effects into account it more than doubles the stiffness of the tube.
  • Problem is, some power meter manufacturers have also been eyeing that 6mm gap and decided to stick a measuring pod on the crank to take advantage of it. That doesn't work for us, if we allow that clearance, the UP would go from fitting 2.1" tires to fitting 1.8" tires or we would have to sacrifice BB stiffness, and both of those are features we and our customers love. Nobody has ever done an epic offroad ride and concluded "that was great, but I would have enjoyed it more if my tires were skinnier and my bottom bracket more flexible."
  • If the pod poses a problem with the outboard position of our chainstays depends on how thick the pod is and where it is located. Around the pedal, we have pretty normal clearance (5-6mm) since that is no longer a critical area for chainstay size, but closer to the rings it gets a lot tighter.

With the reasoning explained, time for the solution :
1- Buy a different powermeter ( Right side, axle placement, pedals, etc)
       - Not desirable due to €€€€ost.
2 - Delrin shim
       - In my case the pod was just grazing the chainstay, not hitting it, so a small spacing should be sufficient.

24mm ID spacers available in 0.5 or 1mm should allow some clearance and are not big enough that I run out of axle or splines do not engage properly.


I tested with a single 1mm spacer, and result is
Free spinning !!! No more fttt fttt fttt

I tried also 2mm and still had proper spline engagement and locknut was good,but seemed to be "too much" clearance, so I am considering 1.5mm to be on the safe side,although 1mm looks pretty good unless there is a lot of flex somewhere under power. (The additional 0.5mm is for flexing).

1.5mm should not be noticeable on Q-Factor, centering, etc, and can easily be compensated in the cleat if needed. 

 Additionally, I have replaced the HollowtechII bolt, with a GOLD one !!!

*UPDATED*

So, my OCD made sure I changed this to 1.5mm spacing.

Here you can see the delrin spacers on the spline. (I left separated so you can see the thickness from the side.

Plenty of engagement left, so no issues with adding 1.5mm, well within tolerances.


Should have "plenty" of clearance now for any twisting under load.

Gravel build - Gearing

Gearing choice for the bike is a sub-compact 48/32 double oval-chainring on a Shimano 6800 crankset.
Why not single ring ? Well.... single is simpler and better for the rough stuff, but in the case of a do-it-all bike, if you want to do some "fast" road riding as well, double is still a nice thing to have, as you have more gear range with smaller gaps.
(Not going into why oval right now, as that is topic for a whole new post eventually)

So, in this case, paired with a 11-34 SLX cassette, the resulting gear range comes to:

CLIMBING - 32 / 34 - with 700c-40mm tires
How fast will I be going at 50-90 rpm in these gears?
 Cadence Gear 5060708090Cadence   Gear
32x346.227.468.719.9511.1932x34


This basically means that for climbing cadences on extreme gradients, I have a gear that allows me to climb at 7 km/h and keep turning the pedals.
Should be enough for all things, as lower than 6 km/h you are better off walking anyway.

Max Speed - 48 / 11 -with 700c-40mm tires
How fast will I be going at 80-110 rpm in these gears?
 Cadence Gear 8090100110Cadence   Gear
48x1146.1551.9257.6963.4648x11
So, for descending, flats, tailwind, etc, you are more than covered with this. If you want to pedal at 60 km/h, you can still do it, 110rpm is still manageable.
I don't have the power to ride at more than that, unless it is a steep descent, and in that case you are probably better off coasting and aero-tucking anyway.

Full-range of the gears is like below.
(Note this is a cheap MTB cassette, so not much optimization done for road/gravel purposes).
How fast will I be going at 80-110 rpm in these gears?
 Cadence Gear 8090100110Cadence   Gear
32x1130.8034.6638.5142.3632x11
32x1326.0429.3032.5535.8132x13
32x1522.5525.3728.1831.0032x15
32x1719.9022.3924.8827.3632x17
32x1917.7820.0122.2324.4532x19
32x2116.0918.1020.1122.1232x21
32x2314.7116.5518.3920.2332x23
32x2613.0214.6516.2817.9032x26
32x3011.3312.7414.1615.5732x30
32x349.9511.1912.4413.6832x34
48x1146.1551.9257.6963.4648x11
48x1339.0643.9448.8353.7148x13
48x1533.8738.1142.3446.5848x15
48x1729.8533.5837.3241.0548x17
48x1926.7830.1333.4836.8348x19
48x2124.2427.2730.3033.3348x21
48x2322.1224.8927.6630.4248x23
48x2619.5822.0324.4826.9348x26
48x3016.9419.0521.1723.2948x30
48x3414.9316.7918.6620.5248x34
Translating the table, this is the speed you will be going in a given gear @ a given cadence.
In the above examples, you can use the tools at BikeCalc.com to check if you will have a low enough/high enough gear for your riding.

In this example, I created a table with every combination to check the gear steps.

To ilustrate this, check the 33 km/h speed highlighted in red. This is a common speed for road group riding etc, so a good example on this. Looking at the table you can see that with this gears, I am able to ride at 33km/h at all of my cadence range, from 80 (or even less, just not plotted) to 110, there is a gear that you can use.

You can also see, that each gear change will affect cadence by around 10 rpm.
(same 10rpm can be seen at 30km/h, 27km/h, etc, just check diagonal lines in the table)

If I change from the 17 to the 19 in the back, my legs will need to spin from 90 to 100 rpm to match the speed.

10 rpms is well within my cadence range, so I not caught in an awkward cadence if I up or downshift.

Monday, May 11, 2020

ISLAGIATT

I am a big fan of "The Sufferfest" training videos, and, as it happens, I just completed the same workout three times.

The session is appropriately named "It Seemed Like a Good Idea at the Time" (you can click there for more info),but basically it is a 2 hours turbo trainer climbing session where you aim the combativity award (or most stupid rider of the day,as I heard it called in the pro peloton).

Here is a preview :


First time was trying it out, number 2 and 3 where part of a training plan where it popped up.
Third time I did it, it almost felt easier, so I wanted to check the stats on it !
(It was the day after a very intense training, so it should not have been the case of simply being more rested).

Back to the results, first time I tried this was on November. I remembered the session to be insane !
2 hours on the turbo was a record for me, I had some difficulty hitting and maintaining the power targets, and ended up kaput.

Looking at the stats, it shows virtual "48.80km" (this is based on power, so it can related to average power) and a relative effort (based on heart-rate) of 155 ( MASSIVE in Strava's naming, yeah felt like it). 


While in lockdown I started a training plan on "the sufferfest", and this showed up on the calendar.
A bit better this time !! Roughly same targets but relative effort is "only" Tough.
Could just be the case of being more used to pedaling on the turbo trainer, as it has been my only exercise for a while ...


This is the one that triggered me to check the numbers !
I hit the targets every time ! (Higher "distance") and relative effort was almost half than back in November!!
A lot is getting used to long turbo session, to the open windows/fans/hidration, but for sure there is also some physical improvement there !

This is the kind of stuff that makes you happy, and is proof is a plan going right !

Wednesday, April 29, 2020

Gravel build - Put the brakes on

Original though for this was to re-use existing post-mount brakes on this build.

Even though the frame and fork have flat mounts, for now the plan was to use components I already had, as there are adapters available for this.

That would mean less pleasant aesthetics but cheaper cost (also the pads are usually much cheaper for postmount stuff).

So, aesthetics wise, with the adapters the solution is simply FUGLY.


As an example pic stolen from here, we can see from left to right:
Postmount caliper on postmount.
Flatmount caliper on flatmount.

Postmount caliper on flatmount fork (see, fugly).

So, doing this on the fork was ok as basically there is nothing behind the fork.
Tried the frame and ... no way in hell it is going to fit.
Even just the adapter alone does not fit (hits the seatstay), so no way in hell.
I need to get new flatmount brakes.

(I could just get one for the rear and use the adapter in front ... but ...  fugly ! )

Choice was to the trusted (and currently on sale) TRP Spyre SLC (carbon wooooo).


There are not much options on mechanical flatmount disc brakes, and these work "OK".
Dual-sided (both pads move, unlike most mechanical disc brakes), use easy to find pads.

What I mean by "OK" is that it is not as good as good hydraulics, but is more than enough for the purpose when paired with compression-less cable housing, good rotors and pads.

Why mechanical ?
Simply because they are much cheaper. I can re-use existing STI levers.
If I drop the bike and break a lever or want to upgrade transmission, much cheaper to buy mechanical.
It is simpler to maintain if I am backpacking somewhere remote, It is simpler to hack something out to fix a cable, rather than look for a hose / bleed kit / hydraulic fluid in the middle of Morocco with a goat on my back.

Getting back to the build.

Got the brakes, installed them in 160mm configuration and done !!

Oh, just one thing, replace the TRP pads ;) You'll thank me later.
(I will save them for the road bike, as I also use Spyres there and road is not so demanding on brakes).


SwissStop are a premium option, Shimano BS01 will also work fine for a budget pad.
(I heard wonders on TruckerCO pads (yes, strange name) but not been able to source them.)

One other thing, the length of the bolt for the rear brake depends on the frame stay width.
Learned it the hard way.

Measure it

29mm in this case, add 6 to 10mm ( so, 35 to 39mm will do ), look for bolts.

Available lengths are 27mm, 32mm, 37mm and 42mm.

Doing the math, in this case 32 is short(less than 35), 42 is long (more than 39), 37mm is just right !! Goldilocks.

ONE IMPORTANT NOTE :
If you order Shimano bolts, the size they mention is chainstay width. You order the 30mm version, to fit a 30mm chainstay, so you get a 37mm long bolt.

If you order TRP or SRAM bolts, you get what you order. 32mm gives you a 32mm long bolt.
(I also learned that the hard way).

Back to the build topic...

Get all the parts, calipers, fixing bolts and plates.

Change pads

Fix to bike, kind of centered.
We finish centering them when the bike is on the stand to install gear cables.


Even the flatmount caliper fits snug !! Really no way to get a fugly adapter there.

Another step closer to a dream bike.


Monday, April 20, 2020

Gravel build - Get the hack saw !!!

Next step, tubes ! headtube and seat tube.

Now that we have axles and wheels, we can turn out attention to *tubes.

NO, I DO NOT MEAN Mother-F&(%D inner tubes !!! Those are extinct now. For Gravel tubeless is 100% the way to go :)

I mean seat tube and steerer / head tube.

(Ok, for the keen eye the headset and bottom bracket bearing appeared magically)
Just a side note, a the headset bearings are integrated, they just pop in place and done.
Just grease and slide them in.

Bottom bracket is BSA, so, just screw it on, and put the Hollowtech II chainset in.

Back to tubes.

Seat tube is too long, so CUT it !
It is always better to cut it, unless you plan to grow up several centimeters (or inches whichever you prefer).

If the seat-tube is too long it can touch the bottle holder screws and creak creak creak.
Make sure to always respect the minimum insertion marks, leave space for changes in saddle/pedals/etc, measure twice and cut once.

bye bye 28grams

Now, headtube...
Install bearings, and stem in appropriate height.
Get elastomers for suspension stem in place... (might need to revisit this later)


Now the important part, on headset measure THRICE and cut ONCE.

Here, you cannot leave margin for error, as it needs to be flush.
On carbon steerer tubes, the stem needs to clamp 100% on the tube, do not leave a gap for preset as in aluminium tubes. (You just place a 5mm spacer on top for that).

You also cannot leave too much space above the stem, otherwise the carbon bung will not be long enough to be inside the complete stem clamping area to reinforce it.

So, measure measure measure, tape it (so carbon does not fray while cutting) and mark it.


Off you go, 55 grams of *tubes !

Re-install and PERFECT ! (Could've cleaned up the grease smears for the picture, but this way it is more real, more reality, more RAW).

Now you can insert the carbon bung, tighten it, compress the bearings, tighten stem as usual.

End result (for the day).


Much nicer without the protrusions, hey ?

Also, placed the handlebars ( FSA energy wing pro compact) for a quick weigh-in.

WOW that's light !
Ok, some 800 grams of parts are missing (sti levers, chain,bar tape) but this is with ALLOY wheels, 38mm tires and MTB pedals !

If I put road carbon wheels (-500grams) in there with road tires (-100grams per tire), it should be able to get this weight for the complete build.
Also, for road, I should not need the 11-34 cassette,if you want to save further weight.

In any case, weight is not a priority here, as everything is for max confort and versatility.
The frameset itself has added weight in order to be more durable.
BSA bottom bracket instead of press-fit,rack mounts,all mounting bolts reinforced.

I am just providing weight data as it is easy and simple to measure and could provide a comparison point, on how little is the weight penalty for the added comfort/versatility and durability of the bike.

Gravel build - Axles

Let's get started with the fun stuff !!!

First, get some measurements on stuff to replace 😆

The included axles kind of negate the benefits of thru-axles. They have a cam shaft like the quick-release ones, and function in a similar way, so thread thread, claaaaaaamm too tight, un-thread, clamp... Too loose, thread a bit more, clamp.

The benefit of through axles (beside of weight and stiffness) is of consistency. Turn to a desired torque, DONE. Always the same alignement everytime.

So, front is 125mm long with 1.5mm thread pitch.
Rear is 168mm long, 17mm thread, with 1.5mm pitch.


It also has a porky 77 grams.


Here comes the replacement :


Brand-X Bolt Thru Axle.
E-Thru    12x142mm   170mm       17mm                M12x1.5           42g
E-Thru    12x100mm   125mm       17mm                M12x1.5           31g
They look nicer, flusher, +aero, simpler, safer, easier and BOOMM 35+40g = 75 grams saved.

Axles use a standard 6mm allen head, so any multi-tool can be used to install/remove wheels on the road.

As an option you can get the switch lever.


You can ride with it (it locks with a spring) or store it in a bag.

Only need one as it works for front and rear.
Even with the lever, they are turn-turn-turn done. No clamping needed.

Staying on the axles topic, the wheelset for this build is a Vision Team 30 disc.

The wheelset is prepared for 9mm axles (or QR compatible) or 15x100/12x100 front via changing hub caps.
Rear can take 10x135 (QR compatible) or 12x135 or 12x142 by changing end caps.(included).

So, front was pop-out, pop-in, all good.

Rear wheel needed two 17mm spanners in order to remove the disc-side endcap. As you need to hold the axle and turn.

I have in my tool box 15mm (pedal) spanner, 16mm, 19mm, 20 and 21mm spanners.
DAWM !!!

So, thank you Wiggle to set me up with this on next-day delivery !! ( I asked for another individual 17mm not pictured).


Now, all is ready on the axle side !


Gravel build


Full of optimism, I decided it was a good time to get started on a new build.

Some time ago I built a winter/commuter/gravel/all-purpose cheap build with some parts I had lying around. Purpose of that was to test the concept of fat-ish tires on road-like frames.
It was AWESOME, truly best of both worlds, even with the budget / old components.

This time, the idea is to upgrade the concept to hopefully get it even better and even more do-it-all.

The frame choice for this is a Holdsworth Mystique ( or Pardus Uragano ) frameset.

Reasons behind this choice :

1- Tyre Clearance, through axles, flat mount disc brakes, BSA bottom bracket.

Those are the must have specs for this (or any) gravel build.

Tyre clearance is good for 700c x 45mm or 650b x 53mm (2.1" Aspens come to mind).
12x100 front 12x142 back axles, keeps all nice and tight.
You can argue with flat mounts, but they are the trend, so more models available here without having to mix-and-match. ( Shimano GRX or other newer Shimano drop handlebars groupsets are all flat-mount only). Should keep the build more future proof.
BSA bottom bracket, because, screw :D

2 - Geometry, geometry geometry.

Based on the past experiments (and some *epic* rides), I pretty much had a solid idea on the position I prefer, so, head over to this fabulous website :
https://geometrygeeks.bike/compare/planet-x-london-road-2015-s,holdsworth-mystique-carbon-gravel-2018-54,trek-domane-sl-2020-54-cm/

Where you can add all the bikes and sizes you want, and compare the stack and reach.
(You can also search by stack and reach).

This way, you can easily compare sizes, geometry charts, and see what bike and what size fits you best.

I was using the London Road frameset in "S" size.
The reach was perfect for me, so it had to be a close number on that.
On the stack, I was using around 50mm of spacers to get the handlebars to the height I wanted, so using a frame with a higher stack, would mean less spacers.

Hence, the Mystique frameset, where I could ride it *SLAMMED* !

3 - Quality vs Price. 

The frameset is VERY VERY REASONABLY priced, and I got 20% discount, so, perfect.

Quality. So far the quality of the frame has been a complete WOW. I traced it back to the "Shandong Taishan Ruibao Composite Material Co. Ltd" factory. (Not difficult to do, it had a sticker with the Quality control process).

The same factory is said to produce some very high-end framesets for "known" brands such as BMC, Scott, Factor, Argon-18,amongs others.

That is all very nice on paper, but looking at the frame, it looks flawless so far !
Very good details, finishing and tolerances. Everything lines up, bearings have been a breeze to install, and everything spins up nicely and evenly.


Choices : 


I will try to use as much stuff as I already have, at least to wear them out completely before upgrading. ( Some issues already presented themselves, details to follow).

One exception to this is BAR TAPE, you always need NEW BAR TAPE, even on old bikes.

I have boxes of bar tape laying around,but I wanted ORANGE bar tape on this.
(It is a necessity).

Choice was Fizik Tempo Microtex bondCUSH.


The colour matches perfectly and the tape seems cushy and grippy.

Updates to follow.